最近很多用户都在官方的推荐下升级到了Win11系统,在这个系统中,有很多小伙伴遇到了一些问题,例如有些用户在插上网线后提示没网,所以今天小编来教大家win11插网线无法访问网络解决方法。
工具/原料:
系统版本:windows11系统
品牌型号:惠普战66五代
方法/步骤:
win11插网线无法访问网络解决方法:
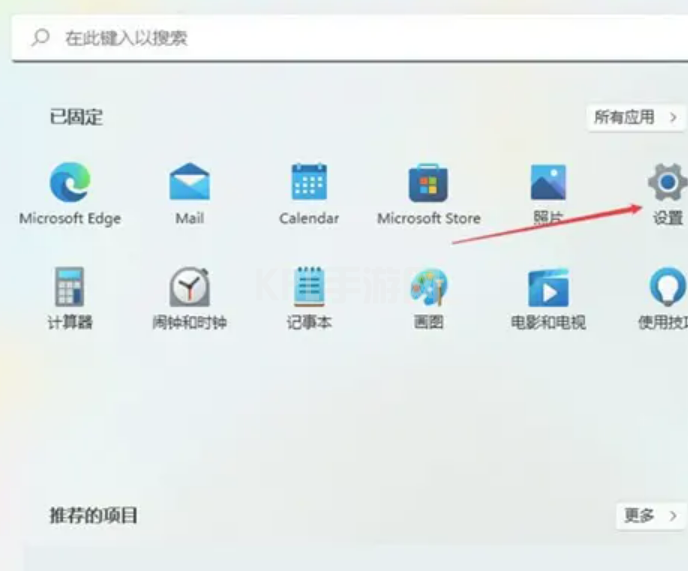
1、首先我们点击win11桌面之中的开始菜单,然后在其中选择开启设置选项;
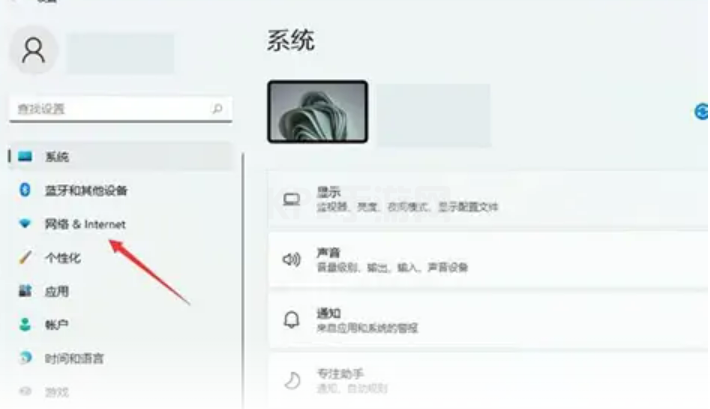
2、在设置界面之中开启网络和Internet选项;
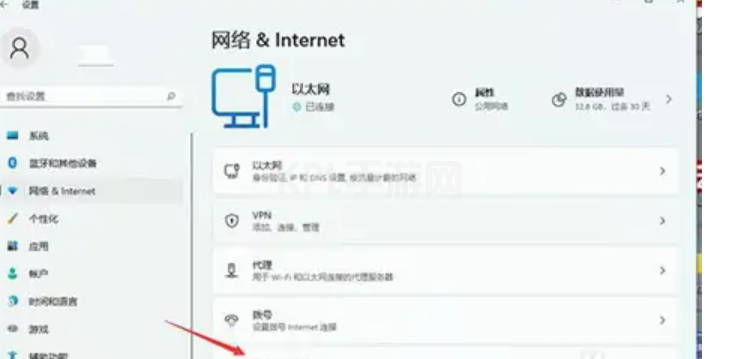
3、然后我们在进入网络和Internet以后,选择右侧的高级网络设置;
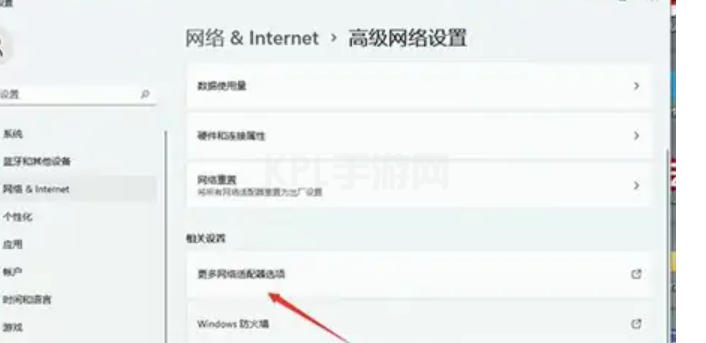
4、接着在右侧单击开启更多网络适配器选项;
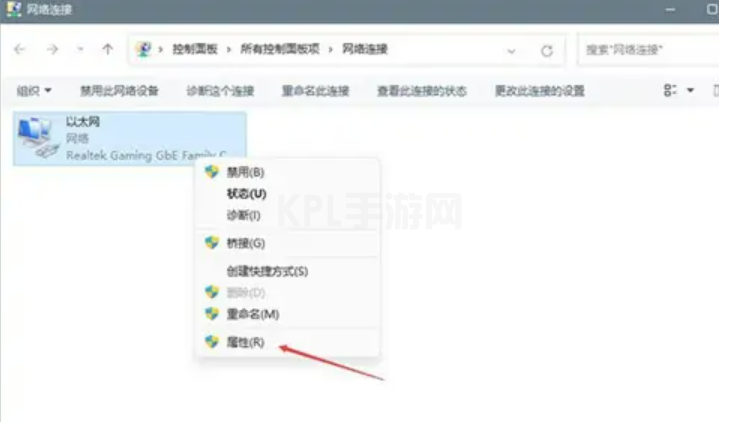
5、然后我们右键单击正在使用的网络,再开启其属性选项;
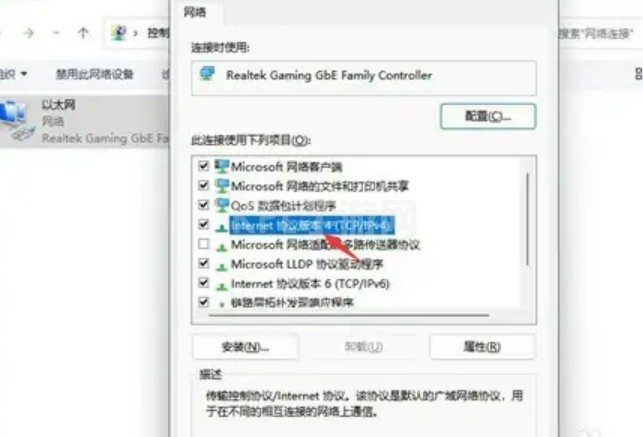
6、在属性中找到Internet协议版本4然后双击打开;
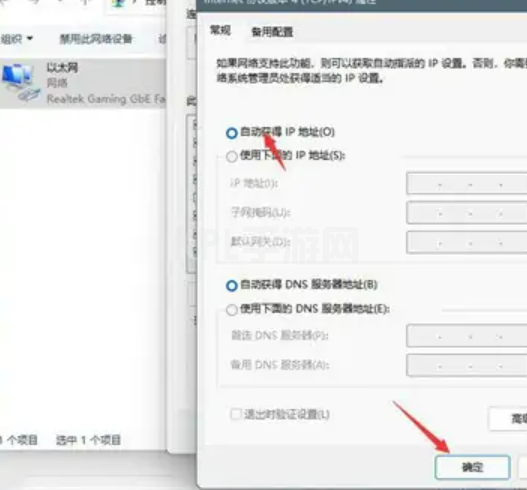
7、最后在该界面设置自动获取IP地址,再单击确定就可以啦。
总结:
打开设置,打开网络和Internet,选择高级网络设置,点击更多网络适配器,打开网络属性,打开Internet协议版本4,自动获取IP并点击确定。